HTTPS Encryption
Encryption on the web has a history of being notoriously expensive, and difficult to implement. Not long ago, you could expect to pay upwards of $1,000 per year to register your website’s SSL certificate with the root server Verisign directly. A shorter time ago, a few re-sellers such as Godaddy came into play. As of the date of this article, one year for Godaddy’s SSL service will cost $69.99 for one website.
While I would have loved to have had a “valid” certificate, for some of my purposes, a snake oil certificate, or self-signed certificate, was secure enough. Since self-signed certificates aren’t validated by a Certificate Authority (CA), modern browsers will try to prevent users from navigating to websites that use them (or any other non-validated certificate).
Now, since I created the certificates on my own server — I hope I can trust myself, I can ignore those messages in that case just fine. This was useful for securing dev websites and code repository connections. Anything public facing, this wouldn’t really be acceptable.
I tried an application called NetDrive a few years earlier with some success in 2010, then a few years later I came across OwnCloud. This package was a decent competitor to Dropbox itself, so I decided to give it a shot. With anything involving logging in and transferring files, it’s a good idea to use HTTPS, so I initially started with my usual self-signed certificate.
Unfortunately if I wanted to link any of the pictures I uploaded to there, anyone clicking on them will see a larger warning message.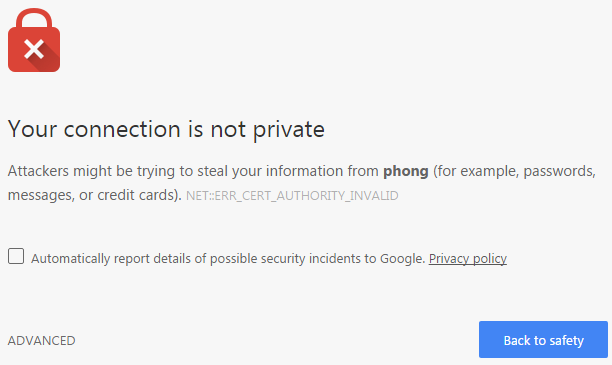
This gave me a few choices:
- Chance not using encryption
- Use SFTP to handle the file transfers
- Search out cheap certificate authorities.
This search eventually led me to StartCom StartSSL, who offered free SSL certificates, it seemed almost too good to be true! Sure enough I signed up, validated the domains that I wanted to set up HTTPS, and I was on my way. There weren’t many extra steps to this process verses using a self-signed certificate, it’s mostly just the fact that a third party validates your self-signed certificate. So after getting everything in the correct directories, and updating my Apache config files, I was online.
Fast forward a couple of years, and there is a new player in town, Let’s Encrypt. These guys caught my attention a few months ago on the tech news article circuit, and a CommitStrip comic. It requires you download a script onto your web server, run it, tell it which domains you want to set up HTTPS for… and you’re done. I didn’t believe it at all until I tried it for myself. An odd catch, the certificates it generates are good for 3 months, instead of 12 months. It comes with the option to have it run nightly to renew them, so it’s mostly a moot point. I haven’t gotten to the point where any have expired yet, so I may have to add a followup.
Browser encryption has come a long way has come a long way, and it’s almost at the point where it’s just as easy to have HTTPS as it is to have standard HTTP.
![]() Server, Web | Scott Wolfenbarger |
Server, Web | Scott Wolfenbarger | ![]() September 14, 2016 2:38 pm |
September 14, 2016 2:38 pm | ![]() Comments (0)
Comments (0)